Wednesday, November 4, 2015

Moving

So we are going to buy our first house (hopefully) in the beginning of next year. When we get our taxes we were told to come back then and get pre-qualified. Fortunately, we should qualify for a first time home buyers loan. All we need to pay is closing costs, which is why we are waiting for our taxes. This is good, though, because it gives me PLENTY of time to get things together.

With the holidays coming up and I will hopefully begin school in January, if I can get financial aid situated, I will be super busy with everything else I wont have as much time to focus on the move. This is why I have started de-cluttering now. I am just going through things and I have a tote I keep behind my couch to put my "donations" in. Once the tote is full I go through it, determine what goes where, and then get rid of it and try to refill as much as I can. This is helping a lot. I will go into more detail about de-cluttering in another post, filled with tips and tricks to help you de-clutter. In the meantime let's talk about moving!

I have started packing some things already that we wont be using until after we move anyways.


My system is this:
  • Each room is color coded and has a number. 
  • Then there is a following number based on the box. 
Sounds complicated, right? Its not, really.
Girls room:
  • So each room is color coded by duct tape. Isabella's room is purple, the kitchen is orange, etc.
  • I stick the duct tape so it runs across the top and side.
  • I label the box number and what is inside the box (in detail, I might add) on both the top and side. 
  • Then I write this down in my notebook. After I finish a few boxes I put them in my storage. (Each house in the complex gets a small storage.)


Let me show you an example:

Box 101 - Isabella's future clothes
Box 102 - toys, books, puzzles
Box 103 - dress up clothes

My bedroom:
Box 201 - Picture Frames
Box 202 - Dresser items

Kitchen:
Box 301 - Plates
Box 302 - oven mitts ? (I couldn't think of any kitchen items, haha)


My goal is that the boxes will easily be able to be separated by its room and checked off once each box is being put away, to make sure we have everything.

I wish I could take pictures to show, it would be so much easier. My other laptop is having major trouble right now and I have no where store my pictures temporarily (this is a chrome book).

When I get all this sorted out I will add some pictures on here and update periodically my move . I have roughly four months until I move (at least that's my goal).

Until then, this is what I do:

I use plastic bags and newspaper for my delicate and fragile items. Forget buying bubble wrap.


P.S. - I will update. This is incomplete.....for now....


UPDATE


So now I have applied for a loan. The lender said we will try for a USDA loan and if we arent approved then we will go for an in-house loan where we put down 10%. 

What we needed to get this loan was:
  • 2 years work history at the same place
  • 2 years rental history
  • 3 or more bills
  • 2 years of W2's
  • 1 month of pay stubs
  • ID's.
They wanted both mine and his for all of this.

It has been three weeks and we are still waiting to hear from USDA. I keep calling my lender but to no avail, she wont call me back. So Im just waiting....Our realtor suggested we go through someone from Wells Fargo where we can possible get a one day approval. I dont understand why it would take one day for that place and not the other but I dont like Wells Fargo. I had them for a bank account when they first bought out Wachovia and lets just say I was not impressed but that is a story for another day...

Back on track:
We have checked out a few houses but when we realized that we were getting nowhere with this loan we decided to take a halt. I'm still packing, though.

So the way I was packing proved to be a success so far as I've needed a few things that were packed away. I was looking for some more long sleeve shirts for the girls, found the box easily; I just looked for the purple duct tape and then looked for the box number (which I knew because I already had box numbers and their contents recorded).
This means there was no reason to open every box until I find it, which is really awesome.

I was thinking about starting my "first night" tote. This is a tote that contains various things needed for a first night in a new house.


Saturday, August 1, 2015

DIY Beach Ideas

So we are going to Myrtle Beach this month and I have been looking up beach stuff on Pinterest. Some things I've tried, other things I think are just cool ideas. Here is a list:

Beach Blanket
sawdust2stitches.com  beach blanket
What's different about this one? It hooks into the sand. Here's how. Very simple.


Ocean Nails
Cool and Fun DIY Beach Party Ideas | http://diyready.com/amazing-diy-beach-party-ideas/
I am so doing this before I go to the beach.


Beach Bag

This is the beach bag I made. Not too shabby for a first try. I'm an amateur sew-er (sewer? Is that right? I don't know...). Maybe the next bag I make I will do a tutorial but here are some other bag tutorials that look pretty cool:
DIY Beach Bag
The One Towel Tote
DIY Beach Towel Blanket With A Pillow
Easy DIY Waterproof Beach Bag


Pocketed Beach Towel

Simple, yet brilliant. Get the tutorial here.


Amazing Beach Life Hacks For Summer has some great ideas.
This pool bag list is pretty cool too.

Monday, July 27, 2015

Are The Standards Too High For Men And Women?

Men are from Mars, women are from Venus. This is true on many levels beyond a grade school one.
Women are detailed, emotional and a bit more involved than our male counterpart. Men are more blunt, forceful and physical.
This difference can be both beneficial and irritating, especially for those "traditional" relationships.
All the expectations are hard to keep up with for both men and women. People always focus on the unrealistic standards that society holds for women but completely neglect that the bar is set pretty high for men, also.

We all know that it is expected for women to look like Victoria's secret models, no hair on our bodies unless it is growing from our head, which we must keep cut, dyed and beautifully made up. When you add it all up it's a lot to keep up with. Heels, hair, make-up, hourglass bodies, clothes that fit tight on slim girls and loose on big ones. There are rules that big girls can't wear bikinis, crop tops, or anything else that demonstrates their "thickness", which society claims is because it "promotes obesity". In all actuality it is because women are supposed to feel shame over a body that is plus size. And if you feel comfortable enough with your body to wear clothes that are a bit revealing you are looked down upon also, regardless of size. Sometimes it feels like a catch 22 trying to live up to the standards that a lot of young men expect to be realistic when it just....isn't. Don't they understand these women they see are like 50% Photoshop? Damn men and their physical nature of life!

This is usually where women start shaming men for even setting these standards to begin with. Ah ah ah! And this is where I start shaking my finger back at you because: remember how women are more emotional? Well, that is where we set our standards.

Us females expect our boyfriends to be Ryan Gosling in The Notebook. Not. Gonna. Happen. Unless, of course, you are married to Nicholas Sparks. We are constantly stuck on them "getting us flowers or jewelry" (I prefer chocolate). We expect special love notes, speeches and displays of their affection both publicly and privately. We want to cuddle and snuggle and expect to be praised. Well, when this doesn't happen we get upset. We believe this is what a relationship is supposed to be when it is no where close to that. Yes, guys do that in the beginning to court you but after you two are settled, what is the point in doing it then? Women expect these things before, during AND after. Men don't always understand this and why should they? Who said that to display your affection for one another you need a diamond on your finger (which brings up society's perspective on marriage, I will write about later because I have some strong opinions on that, too). No one said that you need to write sappy love poems to express your feelings. That doesn't mean he shouldn't take you out for ice cream every now and then, but we females are guilty of setting a high standard, as well.
I want my daughters to understand this so when they grow older they wont be disappointed when their boyfriends don't do all the sentimental things they do in the movies. Just wait until you've been together for five, ten, twenty years. Things change as a relationship matures.

It's as if we are more drawn to what could be than what is. Always searching for the greener grass instead of enjoying the freshly trimmed lawn on our side of the fence. So our yard might have some dirt spots and a lot of bugs, but everyone's does and to think that anyone's yard is a perfect one is delusional thinking. Okay, so that wandered off a little, but do you get what I mean?

Basically,  I just think that society as a whole needs to stop setting such standards to begin with.

Wednesday, July 15, 2015

World Map Mothers Day Present

So for Mothers Day I decided I wanted to make my mom a world map that she can put on her wall. She loves maps and globes and traveling. Wanderlust; it runs in the family.

So I decided her map has to have the following:

  • The entire world. All seven continents, four oceans (although recent studies claim five, I will stick to four.) and everything in-between. 
  • An inspirational quote or two (She's a sucker for that kind of thing. Sorry mom.)
  • Pins to mark both the places she has been and the places she wishes to go. (Well, that is what I wanted to do but didn't add that part.)
  • And lastly, something to write where she has been and where she would like to visit. 
So first off I needed a map. I wanted to print it off so I can work with it the way I want. Plus, if I mess up or change my mind how I want to do this I don't waste any money buying a map. So I searched and searched the internet (mostly Pinterest, since it's my go to for everything). This is the most accurate to what I've envisioned. BONUS - It has the templates ready for download. 

Now of course I will be doing mine differently. Using PicMonkey photo editor, I made an "inspirational traveling quotes" picture along with a "Where I'm going" and "Where I've been"


Next I printed the pages and arranged them how I would be putting them together. 

Then I taped the back of the pieces together so it wouldn't show in the front.
I know the quality of pictures is mediocre but my camera is dead and my phone is all I have charged (for once!).

After this I put in a white frame and began to outline and color every. single. country. Well, most of them. Some were too small.

*FuN fAcT* There are 196 countries. Although the US doesn't consider Taiwan a country, it is run as it's own independent country.


I was never able to get a picture of it finished. My camera AND phone was dead. Go figure. It did turn out pretty cool, though. There were a few little mistakes, but I thought it gave it character and showed just how much effort I put into this. I outlined, colored and labeled just about every country in this world. It was time consuming for sure but well worth it. Next I will be making one for me.

This would be a great project for many ages. Not only does it make a colorful map, drawing it out makes it a little easier to remember where different countries are located. There were places I never knew existed or thought was located somewhere else. It was a really fun experience to figure out where everything was. Then again, I love maps, traveling, the world... See? Runs in the family. 

15 Ways To Save On Expenses

We all have our luxuries. I mean, let's face it, we are addicted to convenience and comforts in life. But that doesn't mean we can't give up a few things here and there. 
Here are some easy ways to cut some of your expenses (and save a little money):

  1. Eat at home. No take-out. No fast food. Pack your lunch and make your dinner. There are some very simple, quick and low-cost recipes to make. 
  2. Coffee at home. As difficult as it is, brew your coffee at home. I know it doesn't have that same creamy flavor as the gas station or your favorite coffee shop but there are ways to enhance the flavor to taste just as good. Here is a link to a great Iced coffee recipe.
  3. Online streaming. I don't have cable. I use Netflix, Amazon and Hulu. I have enough movies and TV shows to stay entertained well. There are kids shows for Isabella and Emily, TV shows for me, movies for Joe. All of this at a fraction of the cost of cable. Netflix and Hulu are about $8/month with features you can add on for a small price. If you get Amazon prime for around $100/year you get not only Instant Streaming but free shipping on Prime items and Prime deals. One site I have heard about but never personally tried is SlingTV (basically live TV on your computer). There are many options that are worth looking into to find what is best for you. 
  4. Walk places. This only applies to some people considering others live in the boonies. If you live in a town or city, consider walking or carpooling. If you live further out in the country, this option maybe isn't for you. Walking and carpooling saves on gas as well as wear and tear on your vehicle. 
  5. Turn off lights. Every time you leave the room, even to go potty, turn the light out. 
  6. Goodwill. Salvation Army. Thrift stores. Sometimes you can find really good sales at the regular stores, also. Point is, cut back on your designer jeans. 
  7. Sales, coupons, digital coupons. Exactly as I said. If you can find a really great sale AND a coupon for it, get it. Sometimes, at the Kroger's near by, they have a sale on top of a sale. For example, said product is already on sale for a dollar or two cheaper. Every few weeks they have a "Buy 5 save 5" or "Buy 6 save 3" where you buy so many of the sale items (which are brands throughout the entire store in different sections) and you get the sale price. Put it simple, I have bought boxes of noodles for less than 40 cents a piece. Pair this with a coupon if you have one and you can get some really great deals. 
  8. E Cards. Cheaper than a Birthday card. Besides, anymore everyone says "Happy Birthday" on Facebook, anyways. 
  9. Air dry clothes and dishes. During the nicer weather, consider hanging your clothes on a clothesline. dry your dishes in a drying rack. This saves the cost of using the dryer and the dishwasher for drying. 
  10. Diy cleaning products. Simple. Very simple. Just about every cleaning recipe begins with water and vinegar. I use this cleaning solution for just about everything and costs SO much less than regular cleaning products. 
  11. Energy saving bulbs. Its in the name. Energy saving bulbs. 
  12. Rechargeable batteries. This one costs more to buy than regular batteries but will make up for it in the long run. We still have the battery chargers we bought several years ago. The batteries cost more than regular batteries but you can charge them afterwards and reuse them instead of throwing them away. All in all, I'd say it's a win. 
  13. Don't let the water run. While you are brushing your teeth, doing the dishes, taking a shower; don't let the water continuously run. Okay, they suggest you turn the water off while you wash your hair but that is not going to happen here. I'm sorry, I love my showers too much for that but everything else I will do.
  14. Open the windows. Let some fresh air in. If it isn't too hot or too cold, it can save the cost of using the heating/AC. Not to mention, it just feels good. 
  15. Use a fan or a heater. Do you know just how much energy you can save using a fan or plugging in a heater? Try it out. 

Best DIY Iced Coffee EVER!

That's right, DIY iced coffee that tastes just as great as the store bought stuff. Not to mention, it is oh so simple (and much cheaper, too).

First, brew a full pot of coffee. My coffee pot makes 12 cups.
Then, in a container (at least 2 qts.) put in some condensed milk. I use the whole can, but I like it kinda sweet. You can adjust to your preference.
After your pot is finished brewing pour the coffee into the container and mix.
That's all!

I have even added creamer for a little extra flavor before, but it tastes just fine without it. Next time I might try adding some whip cream and drizzle. Tastes good hot or cold, actually.

Here is the link where I originally found this recipe.

She uses a glass jug and shakes it, but I use the plastic drink containers from the dollar store and mix with a spoon (like Kool-aid or Crystal Light). At first, I had a concern of the plastic melting from the heat of the coffee, but I have made this many times now and have never experienced this problem.

Yummy.

Thursday, February 19, 2015

Pizza Bites


I love these. So does my daughter, her daddy, his daddy....
They are small, taste good and can be made to your liking. Just use a glass (or cookie cutter) and use it to cute a circle out of a piece of tortilla bread. After that add sauce and toppings. I prefer cheese and pepperoni, ham and pineapple (which I usually don't like on pizzas) or spinach and mozzarella. Also you can add sausage, bacon, bbq sauce, (I did that one night and it was uh-maze-ing! I haven't tried freezing them yet (there is never enough left after I make them!) but Im sure it would freeze good. I did refrigerate it for a few days and used it as lunch for Isabella.
To bake them, heat oven to 425* and put them in about ten minutes, give or take, until desired crispiness.

Monday, January 19, 2015

Oreo pudding cake

So I wanted to make a cake because I have like ten+ cake boxes in my pantry. As usual, though, I can never just make something as is, it has to be more interesting! So I was thinking and thinking about how can I make it with more....oomph? I figured now would be a good time to add the Christmas Oreo's (the Oreo's with red center) and of course pudding! So here is how I did it:
  • First I crushed up some Oreo's and added them to yellow cake batter (made with the eggs, oil, water) and baked it for the specified time. 
  • After it came out I poked holes in it. 
  • I made some pudding mix and poured it over top (I didn't put the pudding in the fridge like you normally would, I just let it sit for a minute or two to thicken a little, but not too much). 
  • Then I added some more crushed Oreo's on top. To crush those ones I put it in a bag and just crushed them like that. With the red filling in the Oreo sticking to the side of the bag, it looked like a bloody mess. Would be a good Halloween gag! 
I was seriously thinking about putting from frosting or whip cream on top (I have some Vanilla whip cream in the freezer!) but I just got too damn lazy. I personally think the cake should be a little more moist but everyone else loved it. I guess I'm just too critical of my own work (I tend to find something wrong with every thing I make).

By the way, I had a wonderful helper.... 
 ....One who also likes to lick the beater AND the spoon! My girl!


Saturday, January 17, 2015

Diaper Motorcycle


So I was looking through pictures for something and I found an old one of a diaper motorcycle I made for someone's baby shower about a year ago. The camera quality isn't that great on the picture but it came out pretty awesome. Especially considering at the time I didn't have much money and was using all things I had from my baby. Now because it was from a year ago I don't have any more pictures of it or any tutorials but here is the site that I got the tutorial from. It is super easy and fun, too. People at the baby shower loved the monkey (diaper) motorcycle.
Click here for tutorial -->Diaper Motorcycle Tutorial
Next time I make one of these it will be so much more awesome and I will have a tutorial of my own for it. I just have to wait for someone else to get pregnant. 

Wednesday, January 14, 2015

Freezer Breakfast Burritos (And Muffins!)

So I have started my "make food now because I wont after the baby is born" routine. Well, its not really a routine, but I am making it one. Anyways, I have decided to start with breakfast burritos (and muffins, but those were boxed, so they don't count). If there is anything useful that I have learned when I worked at McDonald's it is making burritos.
So what I used was simply bacon, egg and cheese. Now, obviously, you can use whatever else in it. Sausage would be great, but I am using that for a sausage, biscuit and gravy casserole so I chose the bacon for this. If you like you can add onions, peppers, hot sauce (which I didn't put any in the burritos but they put some on afterwards and loved it) anything that would freeze well.
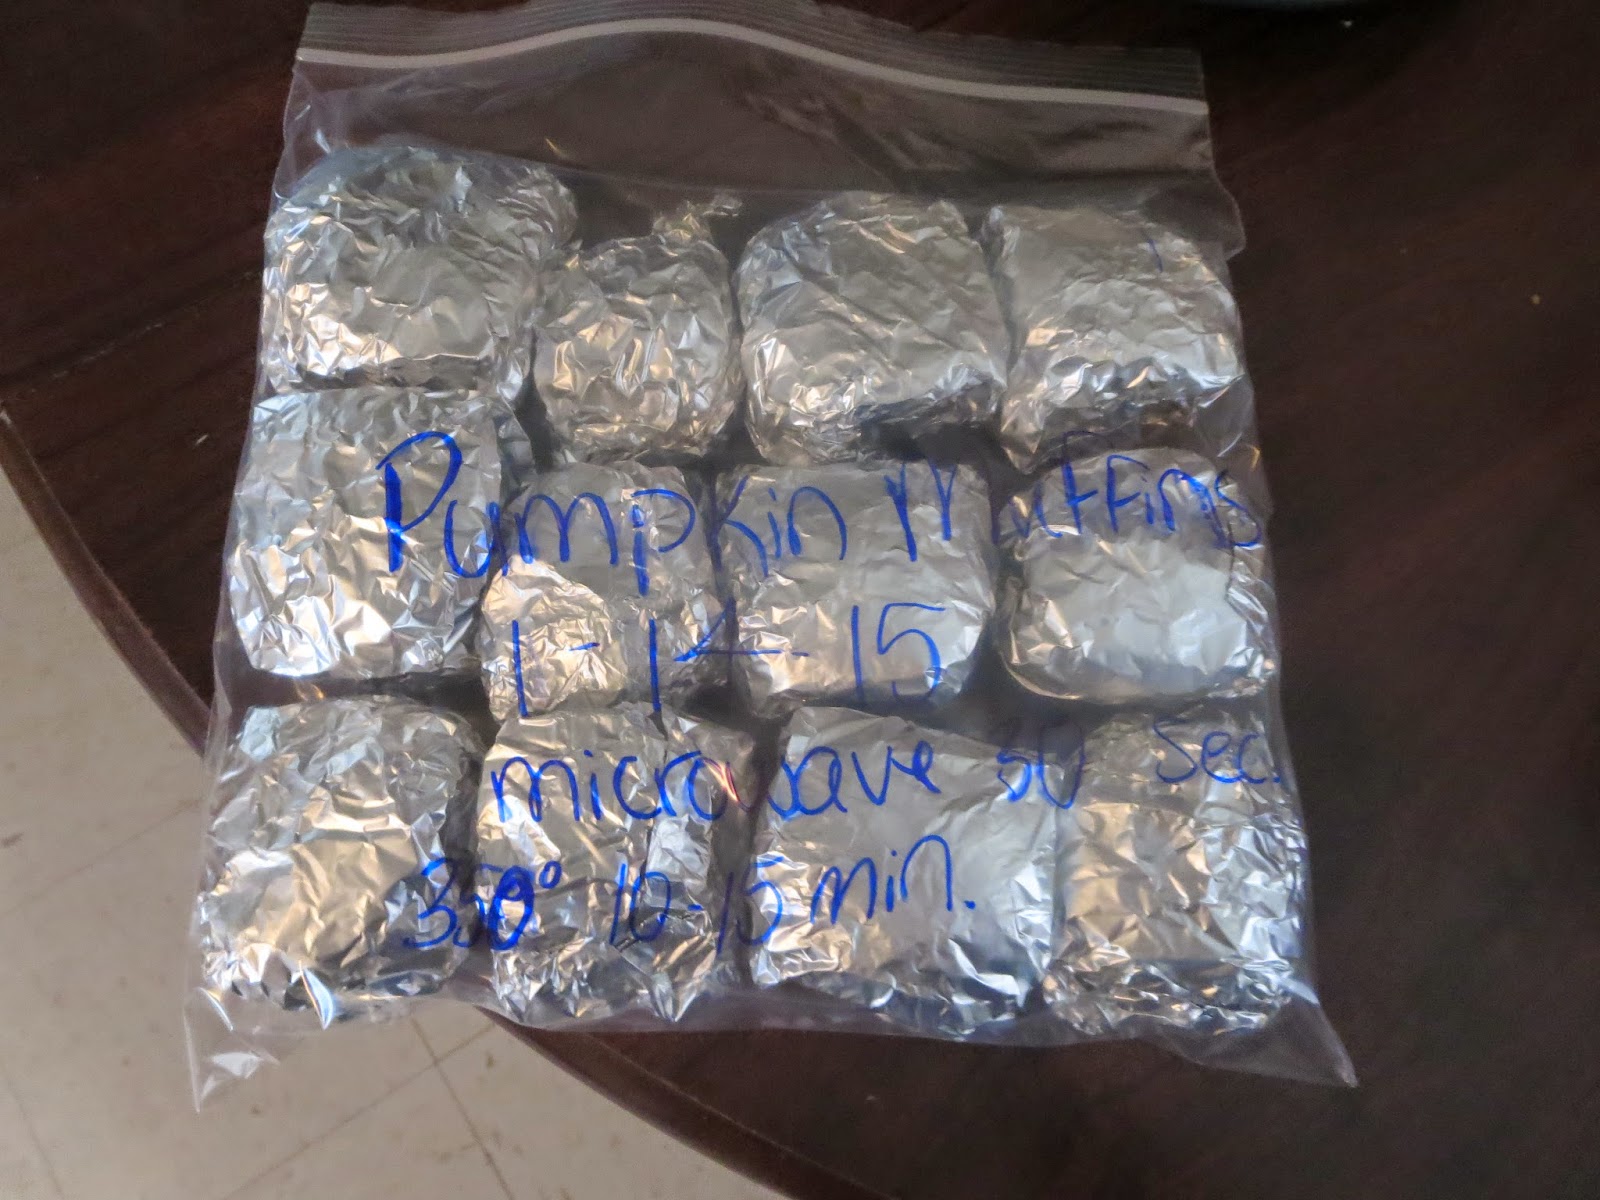
So, lets start from the top, with the cheese. I used shredded on some, sliced american on others. If you use american, break the slice in half and lay it on the tortilla bread. Then add the egg over top. Then add some bacon or sausage. I rolled them up after that and bam! That is is. Then I wrapped it in cling wrap and after I had six of them rolled up (there were more but the men ate some) I put it in a freezer bag and labeled it, dated it and wrote the cooking time on it (microwave 1-2 minutes). I didn't get a picture of that (toddler running around my feet constantly, you understand...), but I have one of the muffins: 
The muffins microwave about 30 seconds a piece or you can heat at 350* for about 10-15 minutes. I wrapped them in foil. Mm...those pumpkin muffins are good, too.

Both the muffins and burritos are good about 3 months frozen! 

So there you have it! It works for people who are busy, too. Or just lazy. Heat it up for the kids before school, after school. Its a great grab-n-go.

Sunday, January 11, 2015

Organizing the Girl's Clothes.

So we have an abundance of clothes for the girls. So many people have given us bags of clothes the past two years that I was running out of places to put it. After Isabella started outgrowing her baby clothes I started cutting them into squares to start her baby quilt. Not all of them, but most of them. Then....surprise! Baby #2. Another girl. I still had a bunch of leftover clothes, not to mention what Isabella was wearing at that time would be saved. Then we got even more clothes from our neighbor. It just kept adding on and on and I couldn't keep up! It was overwhelming trying to fit both Isabella's clothes and Emily's clothes in one closet. I finally finished organizing it today. One side to toddler, the other side to baby. This is the finished result:


Finally the clothes are separated, organized and put in pretty stack-able boxes.
So the left side are "Big Girl Clothes" (the clothes Isabella will grow into), "3T" and then "2T". On the right side is Summer clothes on top, T-shirts and pants in the middle and sleepwear on the bottom. Hanging up underneath (as you can see in the top picture) is long sleeve shirts, then dresses, then sweaters/jackets and finally some more skirts/pants (each hung with specific color hangers.) And the Monster High bucket next to the stack-able bins are Isabella's socks.
So for Emily's side I have her diaper bag on the left. Then I have some hats in a coffee can I covered with pink princess duct tape (topped off with her coonskin hat!). Her 0-6 month pants are in the red holder. Then on the right is her 12 month clothes, 18 month clothes and 24 month clothes. If you look at the second picture above, you can see her hangers are also organized by color starting from 0-3 months, then 3-6 months, 6 months and then 9 months. There are some more newborn and 3 month clothes in my bedroom next to her bassinet, as well. 

As you can see there are a LOT of clothes and it took me a few hours to get it all straightened. There it is though. Im so excited and I feel so accomplished that I just had to show someone. 

Saturday, January 10, 2015

Secret to Easy Cleaning the Trash Can.

How often do you clean out your trash cans? I know I hardly ever do...maybe that is why the bottom looked so completely disgusting. I kept putting it off and putting it off until finally I couldn't take the "eww" anymore (as Isabella would put it). So, let's start from the beginning.
I was cleaning my bedroom; that is a task in itself. By the time I got done I was too tired to really clean out my "eww"-can so I just squirted some soap in it, filled it up with some hot water and left it sitting in the bathtub overnight. The next day I emptied it and....It was still pretty disgusting. I didn't really want to scrub it considering it was gross and I didnt wanna touch it. I mean, how does a small bedroom trash can get wet stuff at the bottom anyways? Then any paper and what else sticks to it and....You get the idea. So this time I put some dish soap and bleach in it, filled it with hot water, let it sit for a minute and BAM! CLEAN! So clean that all I had to do was dry it out. No scrubbing, no nastiness, no nothing! To prove it, I will show you a picture. Now I didn't think to take a before picture but if your trash cans get anything like mine, I'm sure you can imagine. 
This is my trash can. See how clean the inside is?

This is Isabella's can. Somehow her dirty diapers leaked into the can and got all wet and gross on the bottom with some Cheeto's and something else stuck to it. As you can see, clean as can be at the bottom, now. 

Friday, January 9, 2015

What Does Baby Really Need??


There are so many baby products now-a-days. What do you get? Do you really need this?? What about this? And is this a waste of money? Most of us don't have much money to begin with and we don't want to spend what little we have on something completely useless. So here is what you need:

Crib - Crib, bassinet, somewhere safe for your baby to sleep. If you get a crib make sure it passes the newest regulations. They update so often...
Carseat - You cant leave the hospital without one. This is not something you should get used. My advice - get a carrier. Last thing you wanna do it take your sleeping baby out of their carseat. 
Stroller - Even something simple will do. I have a Graco stroller I got for about $30 from Craigslist. 
Clothes - This all depends on how often you can do laundry. All in all, I'd say:
Onesies/shirts - 8-10 in each size. 
Sleepers - 5-10 in each size.
Pants - 5-10 in each size.
Sweaters - 2-3 in each size. Really, it depends on the thickness and the temperature. One light, one thicker and one jacket, maybe? 
Socks - 5-10. You move up a size every 6 months to a year.
Hats - This really depends on where you live and how cold it is. 
Receiving blankets - 5-10. These are great for so many things. Swaddling, cleaning up spit, light blanket, the list goes on...
Baby blankets - 2-5. A little bit thicket but good for tucking a baby into the carseat, propping up a bottle and keeping them warm.
Bottles - Even if you breastfeed, you will probably want to pump. Start off by getting a pack of eight or so. You will lose bottles and get new ones as time goes on. Make sure to get a bottle cleaning brush

One thing you don't need but I highly recommend is a drying rack. I have a Munchkin Sprout Bottle Dryer. I still use it, two years later, for sippy cups and our regular plastic cups, too. I love it.  Only $9.77 at Walmart. Well worth it. 
Munchkin Sprout Bottle Drying Rack

Diapers - I've used cheap diapers, name brand, store brand...As long as it does the job. Some brands, such as Huggies and Pampers, offer rewards. There are many ways to save on diapers from coupons to sales and even deals online. Same with wipes. And don't forget the diaper cream.
Baby Wash - Anything with lavender is great. It's calming and soothing.

If you are having a baby shower, wait until after the shower to get things. And DONT get a lot of newborn stuff. 

Diaper Bag Essentials

Packing a diaper bag... This is something that actually varies from person to person. Every situation is different. If you take a bus or don't own your own vehicle than you might want to pack a magazine and some more toys. In the summer you wont need as many blankets as the winter. Whatever your scenario, here are some things to consider putting in your diaper bag:

Diapers - They say for newborns about 1 every hour you are gone. I just put however many I can fit after everything else. That way I never run out.
Wipes - I suggest getting a travel case. They are small, cheap, cute and you really don't need a whole wipes container, anyways. My first baby I carried the whole big container in my diaper bag and it took up too much space. 
Diaper disposable bag - These are really small bags, you can get a little box of them at the dollar store. I love them. They are really helpful when you are at someones house and need to throw out a stinky diaper. 
Diaper cream - This is a must when you have a newborn. Their poor little bottoms can break out so easily. When Isabella was only a few days old her bum broke out in a rash so bad it was bleeding! Apparently this is normal and just needed some kind of butt cream prescription but for a new mom I was freaking out! 
Bottles - I would always pack a bottle in one side pocket and a bottle of water in the other. This way I was prepared to make a bottle no matter where I was.
Formula or breast pump- This is easier with the smaller cans of formula.
Hats - Not so much in the summer but packing a few hats is good for any other season where it can get a little chilly. 
Socks - 2-3 pairs. They can double as mittens. 
Pants/shirts/onesies/sleepers - However many you feel fit for the situation.
Sweater - I always bring a sweater. I would also recommend bringing one for you too, just in case. Even summer can have chilly nights.
Receiving blankets - About 2. They come in handy for many thing. Same with burp cloths.

Also I will just add here that if your baby uses a pacifier you can get a "baby bag" really cheap. Its a small little pacifier bag that you can stick on your diaper bag.

Some extra things to consider bringing are things like sunscreen, book (one for you and baby), pen and paper (this definitely comes in handy!), a snack for yourself (a moms gotta eat!), toys (age appropriate like a rattle or something small they like).
Some people like to include emergency information in their diaper bag. I mean, don't go carrying your social security card or anything! I would hope that goes without saying, though.

Like I said, it all depends on your situation and needs for what you bring and how much; this is just what worked for me. Good luck and don't forget you will adjust your bag like 50,000 times before you get it how you like it.
Hell, my second baby I don't even use a bag!

Hospital Packing List


So if your a first time mommy, things can be pretty stressful. All the questions you have tend to add up. Trust me, I completely understand! What does baby really need and what are just added conveniences? What do I bring to the hospital? Is this too much or too little? The list of questions go on and on.....
Luckily, us experienced mommies are here to help! I'm gonna tell you just what you need for the hospital trip based on my experience.

~*~First off I would like to add that many hospitals have tours so you can see where you will be staying. Schedule a tour. Its very helpful and gives you a chance to ask what the hospital provides, as well. ~*~

So here is my list of basic things you should bring to have a comfortable stay:

Bathrobe - Invest in a fluffy bathrobe ASAP. You will not regret it. Its an easy way to cover up with all the people coming in and out of your room.

Comfortable clothes - Pajama pants or sweat pants and a baggy t shirt are your best bet when it comes to comfort. Also, make sure it's something you wouldn't mind getting ruined. You bleed a LOT afterwards. 

Slippers and/or fuzzy socks - Something to slip on and keep your feet warm. Something better than hospital socks...

Comfortable underwear - You know the underwear you save for when you get your period? You remember what a period is, right? I know it's been a while. Well, those are the underwear you want. The loosest, biggest, granny panties you can find. They usually provide the underwear which is actually comfortable. You will be wearing big, BIG pads afterwards and if you prefer your own underwear make it big ones. 

Toiletries - Your basics will do. Everyone has different basics. I personally use hairbrush, hair ties and deodorant. Some women consider makeup an essential. Whatever you bring, keep in mind you are only there a few days. No need to pack your entire bathroom.

Snacks - Pack some snacks and water bottles. This is the second most important thing (the first being ID and medical card). You never know when your gonna have to take that trip to the hospital and sometimes by the time you actually have the baby, the cafeteria is long closed. Pack a snack and some change for vending machines.

Entertainment and electronics - Camera and charger, of course! If possible make sure it is cleared off before hand so your not last minute trying to delete pictures just to take a few (been there, done that!) Cell phone and charger so you can let everyone on Facebook know your little one is making their debut appearance. Bring a tablet, kindle, magazine and anything else to keep you occupied. I mean, lets face it, baby will be sleeping most of the time you are there and hospital cable isn't that great. Even an iPod and some headphones would be good.

Pillows and blankets - Bring extra. Trust me. My poor man was so cold sleeping there two nights with me. Even with the hospital pillow and blankets required, the snow storm that hit really made the room cold. 

And Last but not least, just pack the diaper bag and bring it with you. No sense in packing for the baby and then coming home and packing a diaper bag. Just make up the diaper bag now,

I hope this was a helpful list. One more suggestion I have is to print and fill out this handy Birth planner from thebump.com and give it to your doctor or the hospital staff. Now get packing! Sometimes these babies like to come a few weeks early!

The best homemade cleaning solution!


This is the best cleaning solution! I love making it. 

  • 1/2 cup Vinegar
  • 1/2 cup Dish Soap
  • 1/2 - 1 cup hot water


I put it in a spray bottle I bought from the dollar store. Just throw a label on it (or heck, just write on it with sharpie) if you have multiple bottles of cleaning products. Super easy and cleans just about anything! Plus the vinegar disinfects. Also, add a little baking soda for extra cleaning effort.